How to Install WordPress in Hostinger (Step-by-Step Guide)
Installing WordPress in Hostinger is one of the easiest ways to create a professional website without any coding knowledge. Whether you want to start a blog, create a business website, build an online portfolio, or launch an eCommerce store, Hostinger allows you to install WordPress in just a few clicks.
The best part is that Hostinger offers a 1-Click WordPress Installer, making the installation process quick, simple, and beginner-friendly.
In this guide, you’ll learn how to install WordPress in Hostinger step by step. By the end of this tutorial, your website will be ready for customization and content creation.
Note: This guide assumes you’ve already purchased a Hostinger hosting plan and connected your domain to your hosting account.
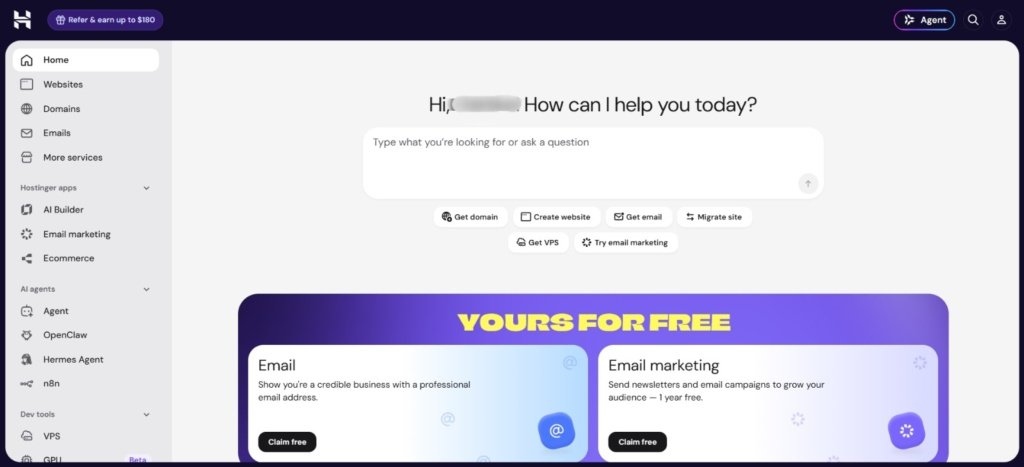
Visit the Hostinger website and sign in using your registered email address and password.
Once logged in, you’ll see the Hostinger Dashboard (hPanel) where you can manage your hosting, domains, emails, and websites.
Step 2: Go to Domains and Select Your Domain
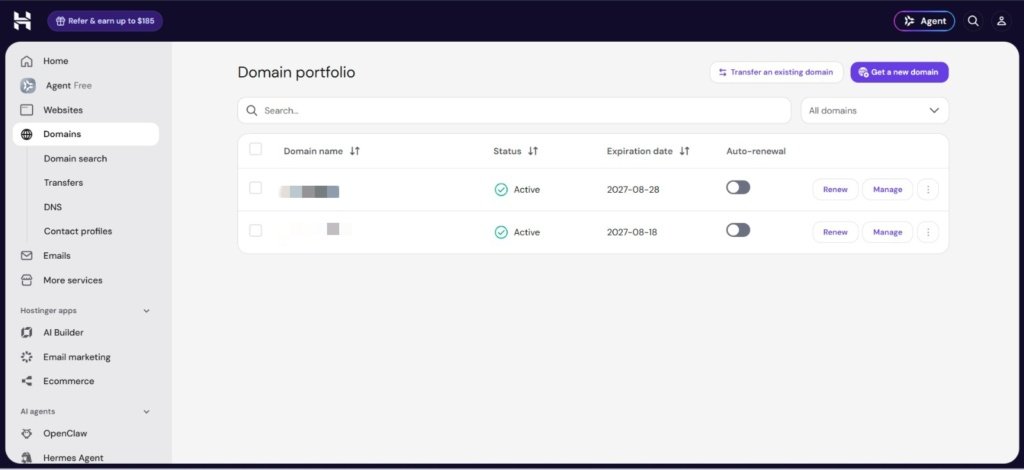
Once you’re inside the Hostinger dashboard, look at the left-hand navigation menu.
Click on Domains.
You’ll now see all the domains connected to your Hostinger account.
Locate the domain where you want to install WordPress.
You can either:
Click directly on the domain name, or
Click the Manage button displayed on the right side of that domain.
Both options will open the management page for your selected domain.
Tip: If you have multiple websites hosted on Hostinger, make sure you choose the correct domain before continuing.
Select the domain where you want to install WordPress.
Step 3: Open Your Website Dashboard
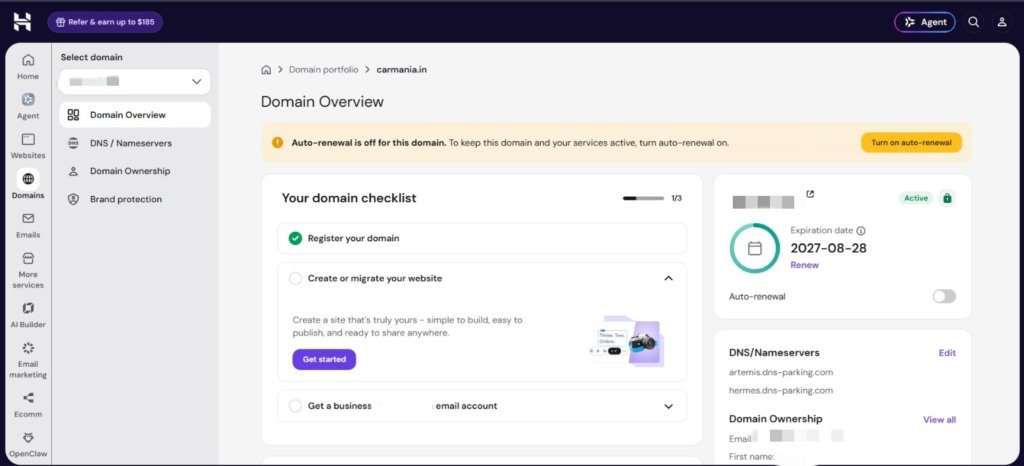
After selecting your domain, Hostinger will open the Website Dashboard.
This dashboard is the control center for your website. From here, you can:
Install WordPress
Manage files
Access databases
Create email accounts
Enable SSL
Monitor website performance
Manage backups
Don’t worry about all the available options. For now, we’re only interested in installing WordPress.
Take a moment to familiarize yourself with the dashboard before moving to the next step.
Hostinger website dashboard where you can manage your website
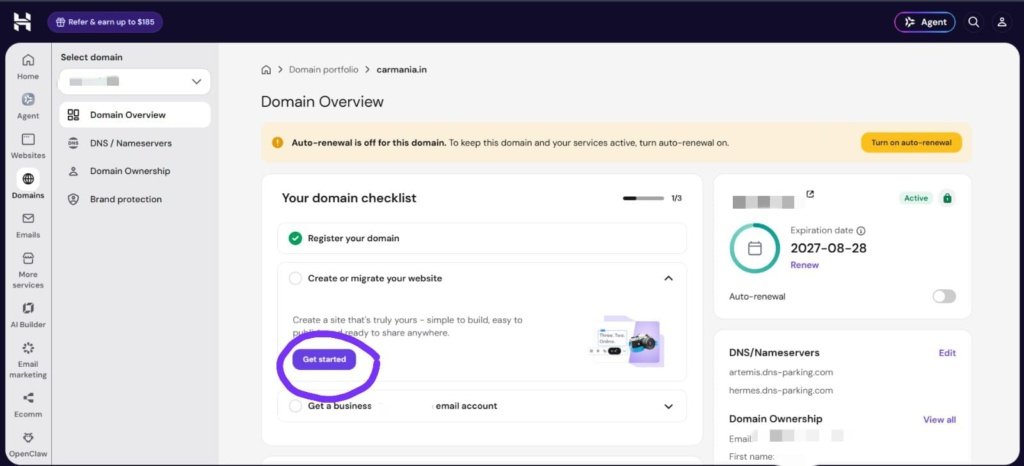
Step 4: Click on Get Started Under “Create or Migrate Your Website”
Scroll down until you see the Create/Migrate Your Website section.
Here, Hostinger provides a quick setup wizard that helps you install WordPress without any technical knowledge.
Click the Get Started button to begin the installation process.
This feature is designed especially for beginners, so you don’t have to manually upload WordPress files or create a database.
Click the “Get Started” button to begin installing WordPress.
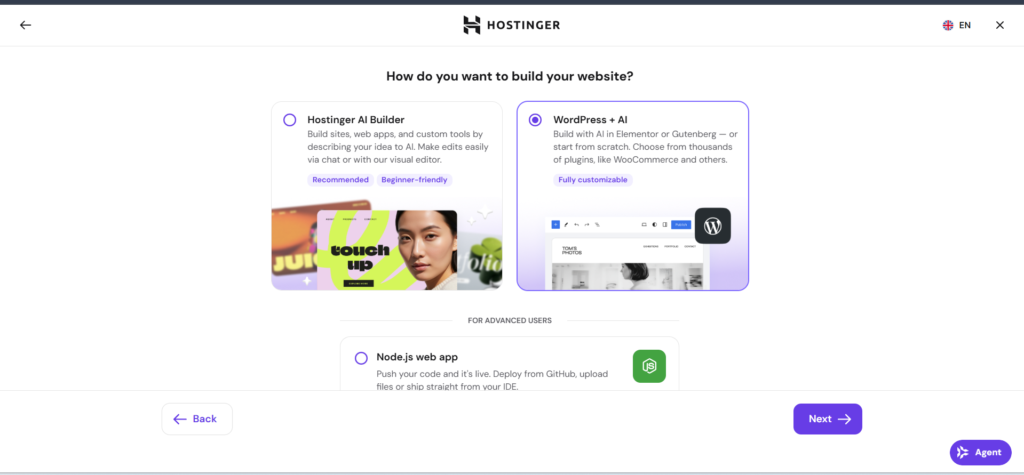
Step 5: Select WordPress + AI
After clicking Get Started, Hostinger will ask how you’d like to create your website.
You’ll see multiple options, including:
WordPress + AI
Other website builders (depending on your plan)
Choose WordPress + AI.
This option installs WordPress and also gives you the choice to create your website using Hostinger’s AI-powered website builder.
Don’t worry—you’ll still have the option later to build your website manually if you prefer complete control over the design.
Once you’ve selected WordPress + AI, click Next to continue.
Why Choose WordPress + AI?
Selecting WordPress + AI offers several advantages:
Faster website setup
Beginner-friendly installation
AI-assisted website creation (optional)
Easy customization later
Full access to the WordPress dashboard
Even if you don’t plan to use AI, selecting this option is perfectly fine because you can still choose to build your website from scratch in the next steps.
Choose the WordPress + AI option to continue with the installation.
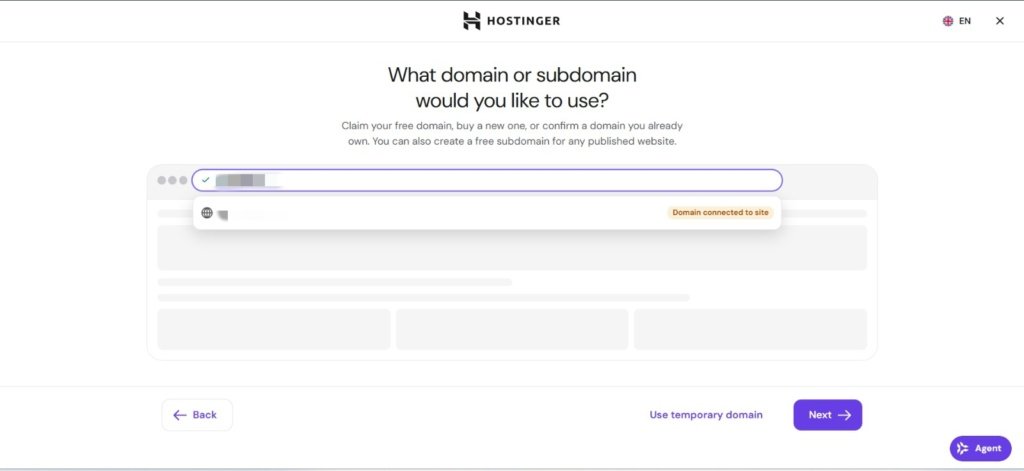
Step 6: Select the Domain Where You Want to Install WordPress
After clicking Next, Hostinger will ask you to choose the domain where you want to install WordPress.
If you have only one domain connected to your hosting account, it will usually be selected automatically. However, if you have multiple domains, click the dropdown menu and select the correct one.
Make sure you choose the domain carefully because WordPress will be installed on the selected website.
Once you’ve selected your domain, click Next to continue.
Tip: Double-check your domain before moving to the next step. Installing WordPress on the wrong domain can create unnecessary work later.
Choose the domain where you want to install WordPress.
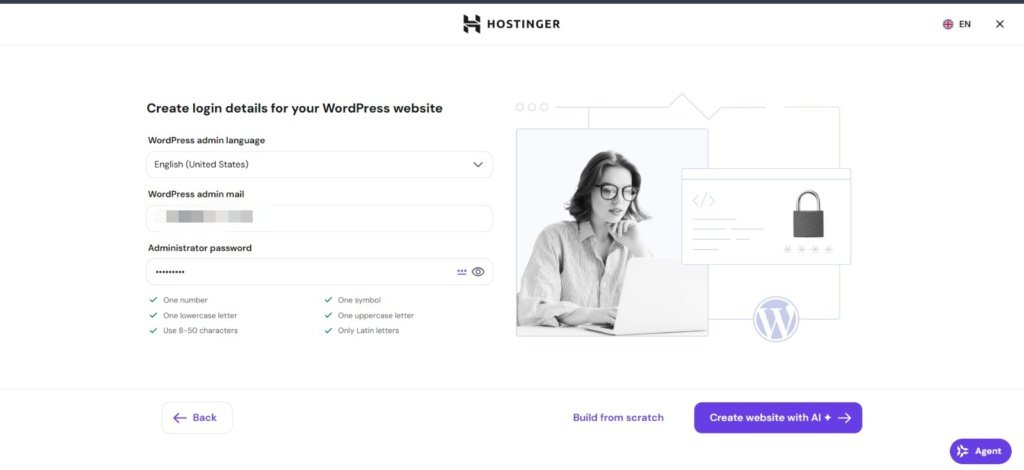
Step 7: Create Login Details for Your WordPress Website
The next screen is Create Login Details for Your WordPress Website.
Here, you’ll create the credentials you’ll use to log in to your WordPress dashboard.
Fill in the following information carefully:
WordPress Email Address
Enter an active email address that you can access.
This email will be used for:
Password recovery
Security notifications
Website updates
Admin alerts
Administrator Username
Choose a unique username for your WordPress website.
Avoid common usernames like:
admin
administrator
root
Using a unique username improves your website’s security.
Security Tip: Save your WordPress username and password in a password manager or another secure location. You’ll need these credentials every time you log in to your website.
Create your WordPress administrator account.
Step 8: Choose How You Want to Build Your Website
After entering your login details, Hostinger gives you two options:
Option 1: Create Website with AI
If you’re new to website creation or want a website ready in just a few minutes, choose Create Website with AI.
Hostinger’s AI Website Builder will ask you a few simple questions, such as:
What is your website about?
What type of business do you have?
What style do you prefer?
Based on your answers, it automatically creates a basic WordPress website with relevant pages, text, and images. You can later customize everything according to your needs.
This option is ideal for beginners who want to save time and get a professional-looking website quickly.
Option 2: Build from Scratch
If you prefer complete control over your website’s design and content, choose Build from Scratch.
This option installs a clean version of WordPress without any AI-generated content. It’s the best choice if you want to create every page yourself or use your preferred theme and plugins.
Most web developers and bloggers choose this option because it gives them full flexibility from the beginning.
Our Recommendation: If you’re learning WordPress or following this tutorial, Build from Scratch is the better option. It helps you understand WordPress from the ground up and gives you complete freedom to design your website.
Choose whether to create your website with AI or build it yourself.
Step 9: Install WordPress
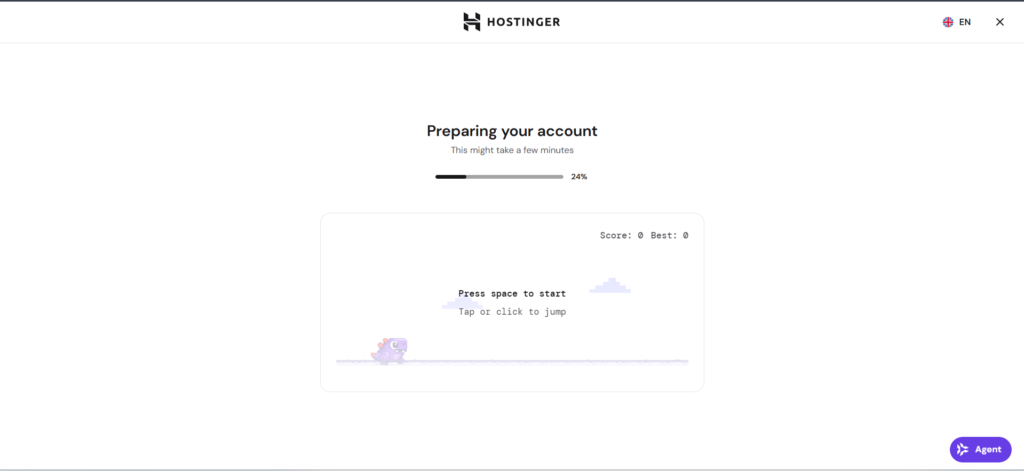
If you selected Build from Scratch, Hostinger will immediately begin installing WordPress on your selected domain.
The installation process is automatic, so you don’t need to upload files, create databases, or configure any technical settings manually.
During the installation, Hostinger will:
Install the latest version of WordPress
Configure your website automatically
Connect WordPress to your hosting account
Create the required database
Prepare your website for use
The installation usually takes less than a minute, although it may take slightly longer depending on the server.
Once the installation is complete, Hostinger will automatically redirect you to your WordPress Dashboard.
Congratulations! 🎉 Your WordPress website is now ready.
Hostinger automatically installs WordPress on your selected domain.
Step 10: Access Your WordPress Dashboard
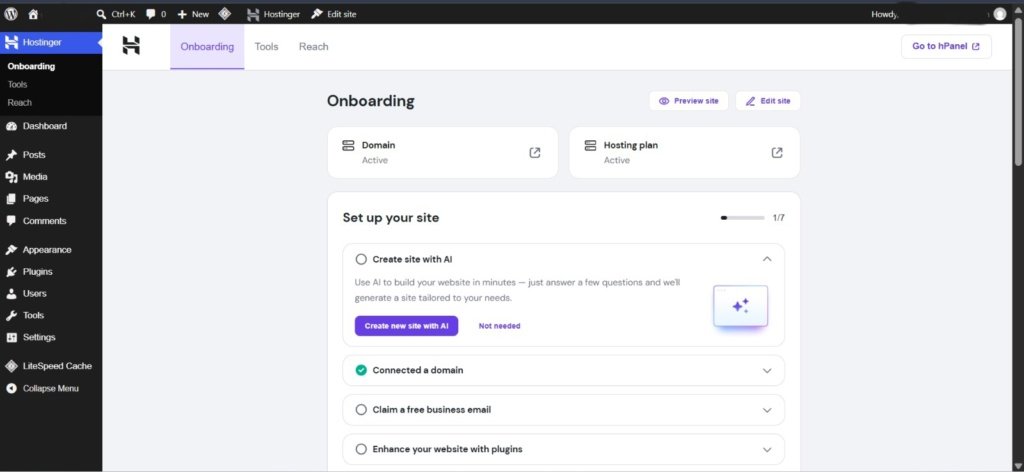
After WordPress has been installed successfully, you’ll be taken directly to the WordPress Dashboard.
This is where you’ll manage every aspect of your website.
From the dashboard, you can:
Create pages
Publish blog posts
Install themes
Add plugins
Upload images
Manage menus
Change website settings
Customize your site’s design
Think of the WordPress Dashboard as the control center of your website.
The WordPress dashboard is where you manage your website.
How to Check if WordPress Is Installed Successfully
If you want to confirm that WordPress has been installed correctly, there are two easy methods.
Method 1: Visit the WordPress Login URL
Simply add /wp-admin to the end of your domain name.
For example:
https://www.example.com/wp-admin
If you see the WordPress login page, congratulations! Your installation was successful.
Enter the username and password you created during installation to log in.
Method 2: Open the Dashboard from Hostinger
You can also log in through your Hostinger account.
Open your Hostinger Dashboard.
Select your website.
Click Dashboard from the left-hand menu.
This will take you directly to your WordPress admin panel without needing to type the URL manually.
Pro Tip: Bookmark your WordPress login page (yourdomain.com/wp-admin) in your browser. This makes it quicker to access your dashboard whenever you want to update your website.
Congratulations! WordPress Has Been Installed Successfully
Congratulations! 🎉 You have successfully completed the WordPress installation process in Hostinger.
Your website is now ready, and you can log in to your WordPress Dashboard anytime or simply open your Hostinger account and click on the Dashboard option for your website.
From here, you can start building your website, creating pages, publishing blog posts, and customizing everything according to your needs.
Related Guide
If you ever want to remove your current WordPress installation and start over, check out our guide:
How to Uninstall WordPress in Hostinger in Under 1 Minute
How to Install a WordPress Theme in Hostinger
How to Install WordPress Plugins
This guide shows you the quickest and safest way to uninstall WordPress without affecting your hosting account.