


How to Buy Domain and Hosting from GoDaddy (Step-by-Step Guide for Beginners)
If you’re planning to create a website, one of the first things you’ll need is a domain name and a web hosting plan. A domain name is your website’s address (such as example.com), while hosting stores your website’s files and makes them available online.
This How to Buy Domain and Hosting from GoDaddy guide explains every step in simple language so even beginners can follow it without confusion. By the end of this tutorial, you’ll have your own domain and hosting ready to build your website.
What You’ll Need Before You Start
Before purchasing, make sure you have:
- A domain name idea
- An email address
- A debit/credit card or another supported payment method
- About 15–20 minutes to complete the process
Step 1: Open the GoDaddy Website
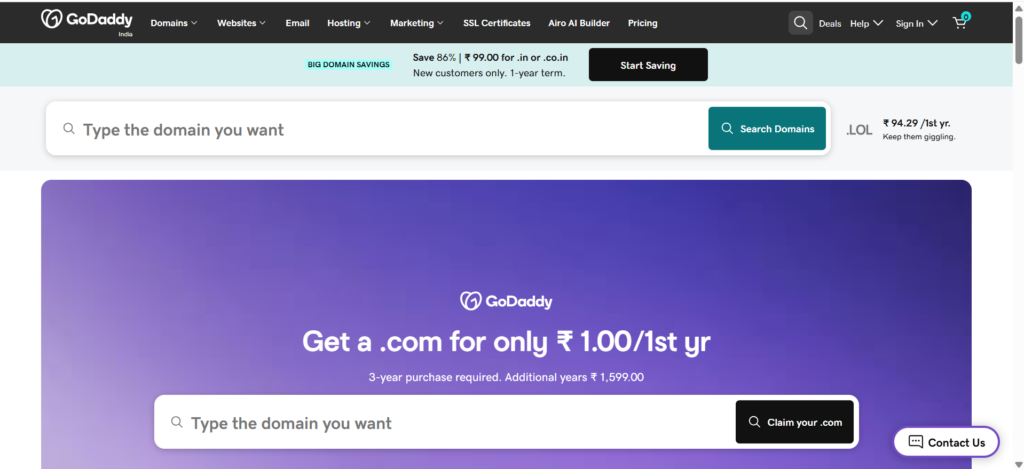
Visit the official GoDaddy website and you’ll see the homepage with a search bar where you can check if your preferred domain name is available.
Enter the domain name you want to register and click the search button.
If your chosen domain is available, you’ll be able to purchase it immediately. If not, GoDaddy will suggest similar alternatives.
Step 2: Login, Sign Up, or Create an Account
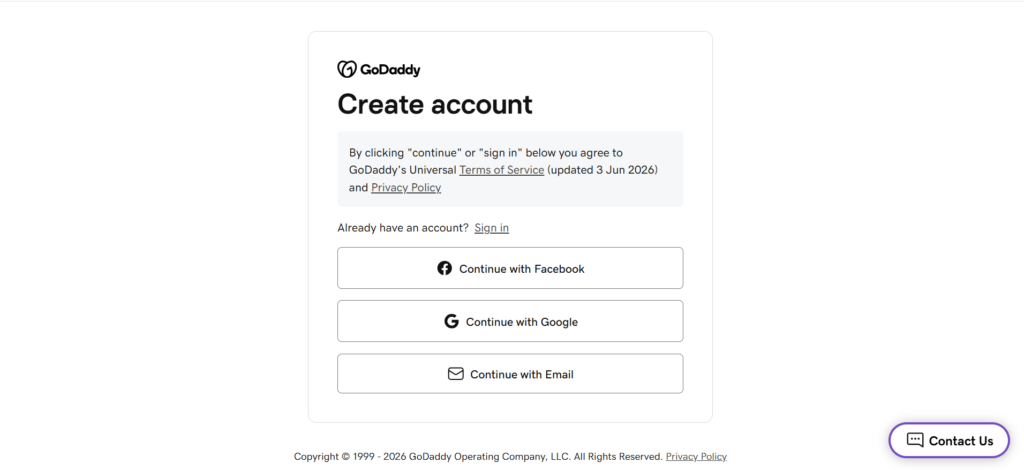
If you don’t have a GoDaddy account, click Sign In and then select Create an Account.
You can register using:
- Email address
- Google account
- Facebook account (if available)
Once your account is created, you’ll be redirected to the GoDaddy homepage.
Creating an account first helps you manage your purchases, renewals, and website settings from one dashboard.
Step 3: Search and Register Your Domain Name
After returning to the homepage, locate the search bar at the top of the page.
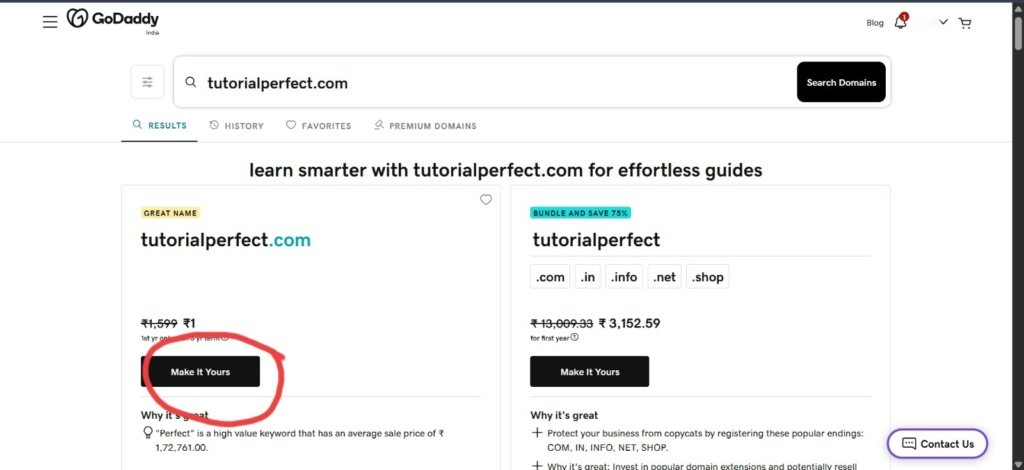
Type the domain name you want to purchase and search for it.
If it’s available:
- Click Make It Yours.
- The domain will automatically be added to your cart.
- Now you’re ready to choose a hosting plan.
If your preferred domain isn’t available, try:
- Using another extension (.net, .org, .co)
- Adding your business name
- Using short and memorable words
Tip: Choose a domain name that is easy to spell, short, and related to your website or business.
Step 4: Add a Hosting Plan
Now it’s time to purchase hosting.
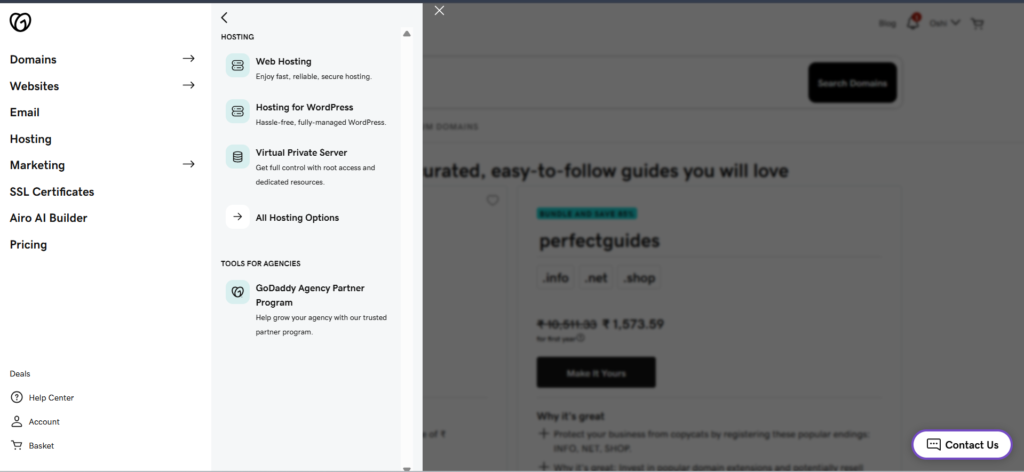
Click the three-line menu (☰) in the upper-left corner.
Navigate to:
Hosting → Web Hosting
or
Hosting → Hosting for WordPress
Choose the option that best suits your needs.
Which Hosting Should You Choose?
Web Hosting
Best for:
- Personal websites
- Business websites
- Custom websites
- Beginners
WordPress Hosting
Best for:
- WordPress websites
- Blogs
- Portfolio websites
- WooCommerce stores
Important Note: It is always better to purchase your domain name and hosting from the same provider. Buying them from different companies makes the setup process slightly more complicated because you’ll need to connect them manually by changing nameservers and DNS settings. Keeping both services with one provider makes website management much easier, especially for beginners.
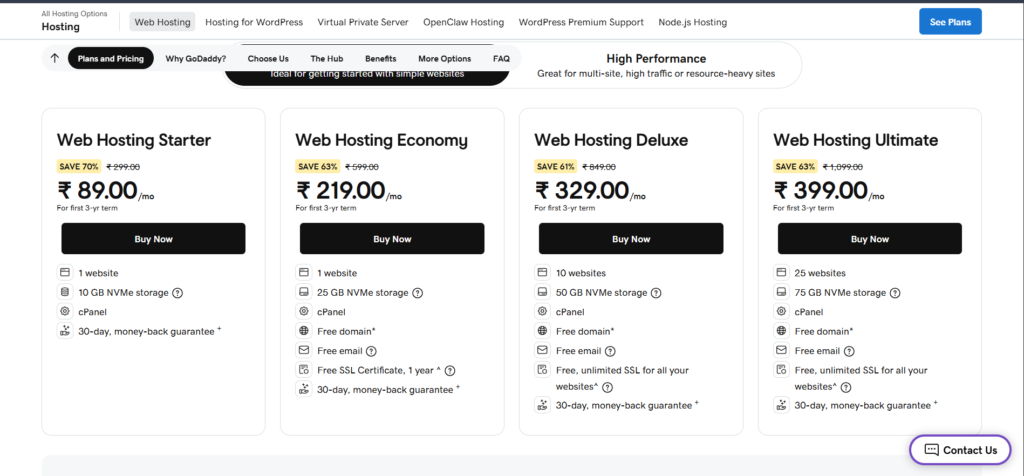
Step 5: Select Your Hosting Plan
GoDaddy offers multiple hosting plans.
Some common plans include:
- Starter
- Economy
- Deluxe
- Ultimate
- Maximum
Choose the plan based on your website’s needs and budget.
You’ll also need to select the hosting duration, such as:
- 6 Months
- 12 Months
- 24 Months
- 36 Months
Recommended Choice
For beginners, a 12-month hosting plan is usually the best option.
It offers a good balance between cost and commitment, and you can renew it after one year if you’re happy with the service.
Step 6: Review Your Cart and Proceed to Checkout
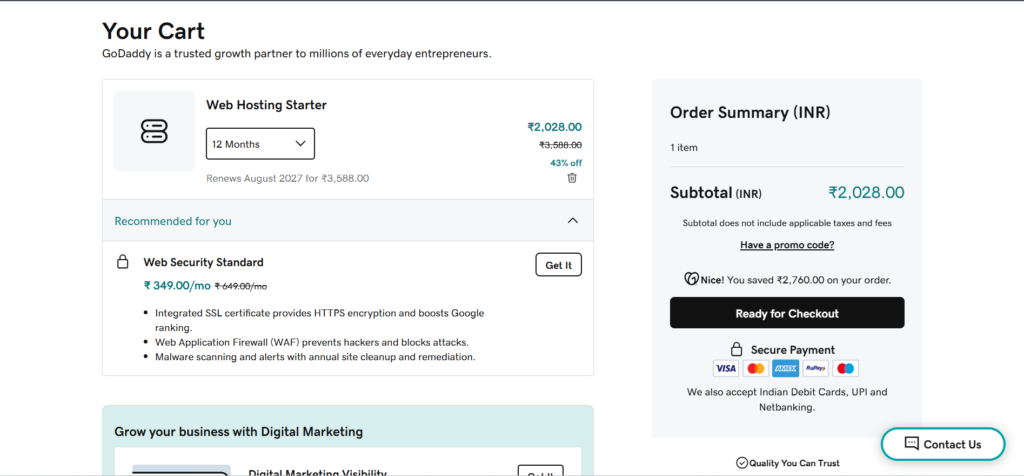
Once you’ve selected your hosting plan:
- Open your cart.
- Review your selected domain.
- Review your hosting plan.
- Remove any optional extras you don’t need.
- Click Ready for Checkout.
You’ll now see a checkout page asking for your billing information.
Fill in:
- Name
- Address
- Phone number
- Email address
Then choose your preferred payment method.
Take a final look at your order before making the payment.
Note: If you have a GoDaddy coupon code, apply it before completing your purchase to save money.
And if you Don’t have a coupon code?
You can visit Grabon.in to look for the latest GoDaddy discount coupons. If a valid coupon is available, apply it to your cart before making the payment.
Step 7: Complete the Payment
After confirming your details, complete the payment.
Once the payment is successful:
- Your domain name will be registered.
- Your hosting account will be activated.
- You’ll receive a confirmation email from GoDaddy.
Congratulations! You now own your domain and hosting.
Access Your GoDaddy Dashboard
After your purchase:
- Log in to your GoDaddy account.
- Open My Products.
- You’ll see your:
- Domain
- Hosting
- DNS Settings
- Website Management options
From this dashboard, you can:
- Manage your domain
- Install WordPress
- Access your hosting
- Manage email services
- Renew subscriptions
Tips Before Buying Domain and Hosting
- Choose a short and memorable domain name.
- Register your domain for at least one year.
- Select a hosting plan that matches your website size.
- Buy both domain and hosting from the same provider for easier management.
- Carefully review your cart before making the payment.
- Save your GoDaddy login details securely.
Now that you know How to Buy Domain and Hosting from GoDaddy, you can confidently register your domain name, choose the right hosting plan, and complete your purchase without any confusion. Once your domain and hosting are ready, you’re all set to install WordPress and start building your website.