


How to Buy Domain and Hosting from Hostinger (Step-by-Step Guide for Beginners)
Introduction
In this guide, you’ll learn how to buy domain and hosting from Hostinger step by step. By the end of this tutorial, you’ll have your own domain, hosting plan, and everything ready for the next step—installing WordPress.
Tip: If you haven’t yet understood what a domain name and web hosting are, read our Website Basics guide before following this tutorial.
Note: The Hostinger interface may change slightly over time, but the overall purchasing process remains almost the same.
Things You’ll Need Before Purchasing
Before you buy domain and hosting from Hostinger, keep the following ready:
- A valid email address
- Debit card, credit card, PayPal, or another supported payment method
- Your preferred domain name ideas
- A stable internet connection
Having these ready will make the purchasing process much smoother.
Step 1: Visit the Hostinger Website
Open the Hostinger website in your web browser. On the homepage, you’ll find a search box where you can check whether your desired domain name is available.
Simply enter the domain name you want (for example, yourwebsite.com) and click the Search button. If the domain is available, you’ll be able to continue with the registration process. If it’s already taken, Hostinger will suggest other available domain extensions or similar domain names
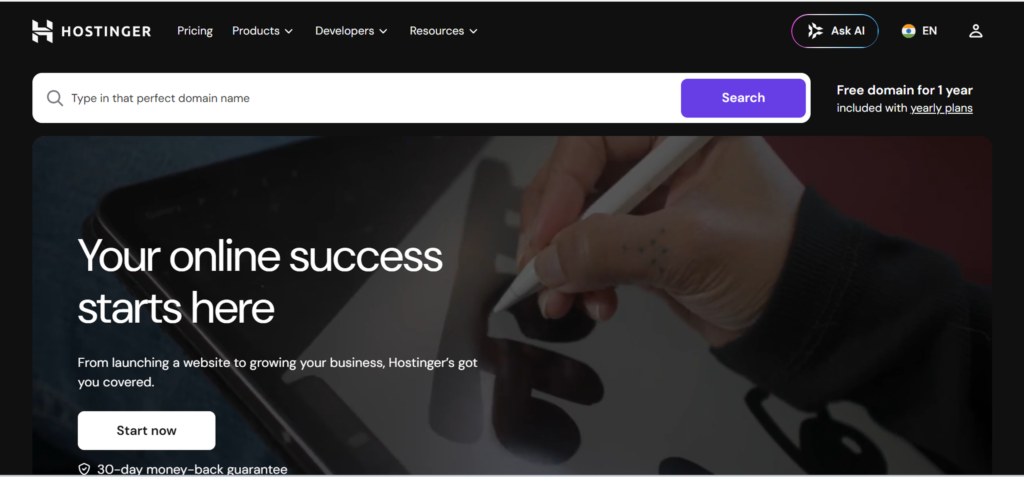
Tip: Choose a domain name that is short, easy to remember, and relevant to your website or business.
Step 2: Select Your Domain and Click “Make It Yours”
Once you’ve found an available domain name, review the available options and select the one you want to purchase.
After selecting your domain, click the Make It Yours button to add it to your cart and continue with the next step.
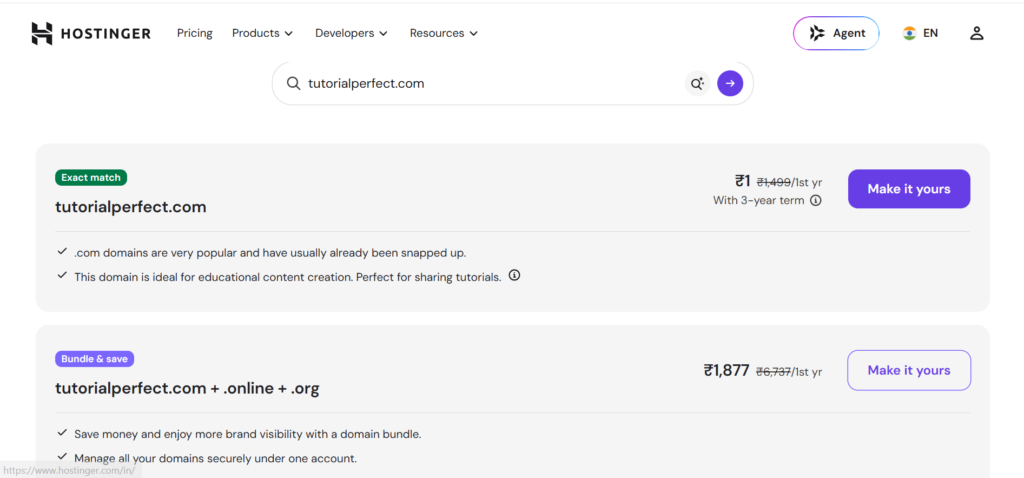
Tip: If possible, choose a .com domain because it is the most recognized and trusted domain extension worldwide.
Step 3: Choose Your Hosting Plan
After selecting your domain, Hostinger will ask whether you’d like to add a hosting plan.
You’ll see different hosting plans, such as:
- Premium Web Hosting
- Business Web Hosting
- Cloud Hosting
If you’re just starting your first website, I recommend choosing the Premium Web Hosting plan. It includes all the essential features beginners need, such as fast performance, a free SSL certificate, email accounts, and enough resources to launch a personal blog, portfolio, or small business website.
As your website grows, you can upgrade to a higher plan at any time without losing your website data.
If you only want to purchase a domain name for now, you can skip the hosting plan and continue with just the domain purchase.
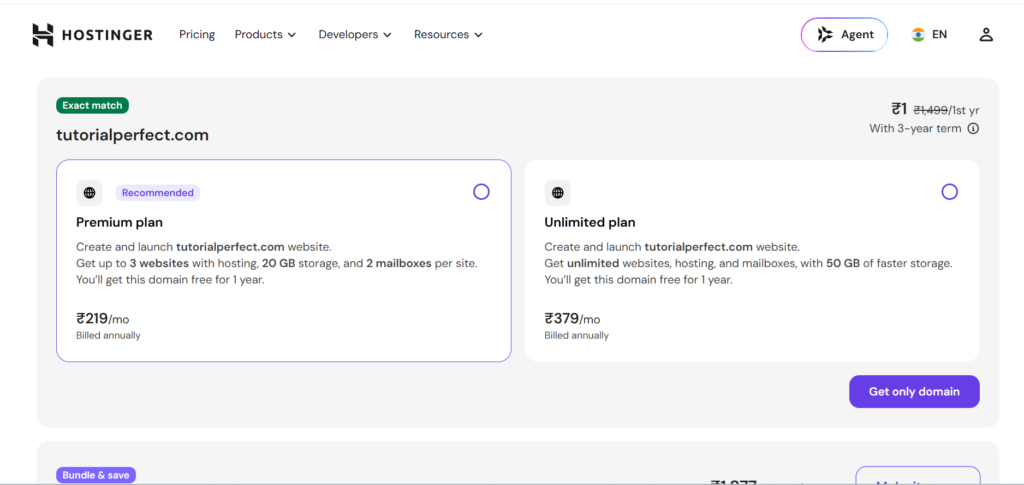
Note: It is always better to purchase your domain name and hosting from the same provider. Buying them from different companies makes the setup process slightly more complicated because you’ll need to connect them manually by changing nameservers and DNS settings. Keeping both services with one provider makes managing your website much easier, especially for beginners.
Step 4: Review Your Order Summary
Before making the payment, carefully review everything in your shopping cart.
Check the following details:
- Selected domain name
- Hosting plan
- Subscription period
- Total amount
- Any optional add-ons
If you have a Hostinger coupon code, apply it before completing your purchase to save money.
Don’t have a coupon code?
You can visit Grabon.in to look for the latest Hostinger discount coupons. If a valid coupon is available, apply it to your cart before making the payment.
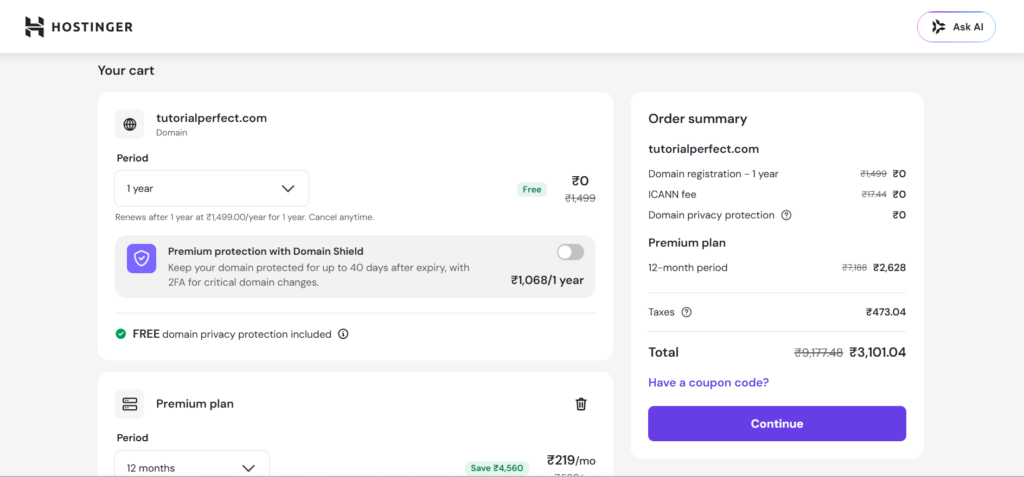
Tip: Always review your order carefully before proceeding. Removing unnecessary add-ons can help reduce your total cost.
Step 5: Log In or Create Your Hostinger Account
Once you’ve reviewed your order, click Continue.
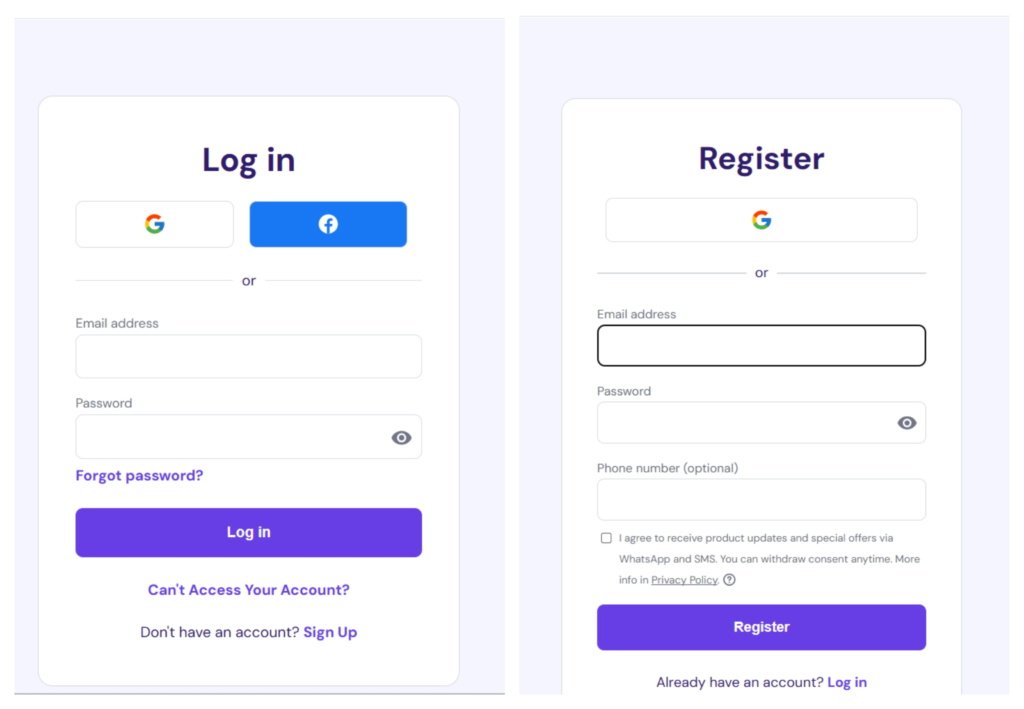
Hostinger will now ask you to log in to your account.
- If you already have a Hostinger account, simply enter your email address and password.
- If you’re a new user, click Create Account and register using your email address or your Google account.
After successfully signing in, you’ll automatically be redirected to the payment page.
Step 6: Complete Your Payment
Choose your preferred payment method and complete the transaction.
Hostinger supports several payment options, including:
- Credit/Debit Card
- UPI
- Net Banking
- Digital Wallets
- PayPal (availability may vary by country)
After the payment is successful, your domain and hosting will be activated automatically. You’ll also receive a confirmation email with your purchase details and can access your Hostinger dashboard to start building your website.
Step 7: Access Your Hostinger Dashboard
After your payment is confirmed, log in to your Hostinger account.
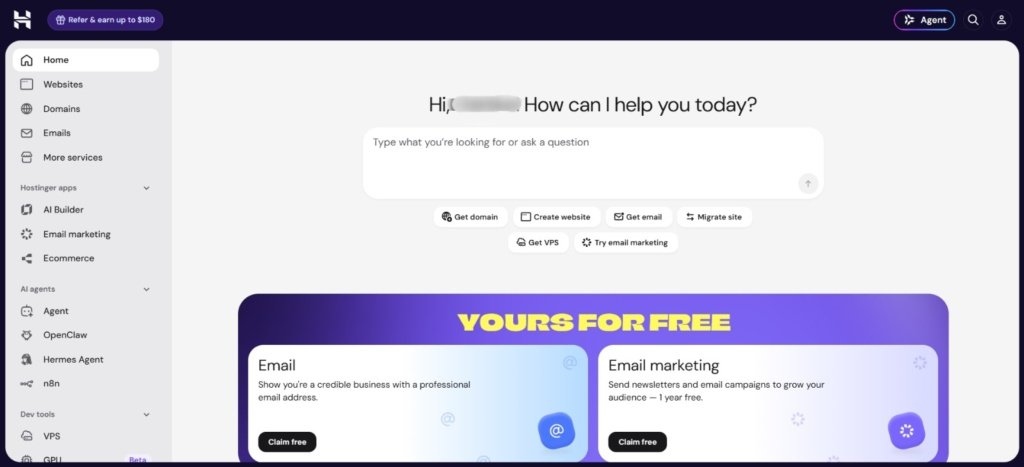
You’ll now see your Hostinger Dashboard (hPanel).
From here, you can:
- Manage hosting
- Manage domains
- Install WordPress
- Create email accounts
- View billing information
This dashboard is where you’ll manage your website in the future.
What’s Next After Purchasing?
Congratulations! 🎉
You have successfully completed the process to buy domain and hosting from Hostinger.
The next step is installing WordPress so you can start building your website.
Our next guide will explain the complete WordPress installation process step by step.
Frequently Asked Questions (FAQs)
Which Hostinger hosting plan is best for beginners?
Premium Web Hosting is usually the best choice for beginners because it provides the features most new websites need at an affordable price.
Can I install WordPress after buying hosting?
Yes. Hostinger provides a simple one-click WordPress installation process, making it easy for beginners to create a website.
Can I buy only hosting from Hostinger?
Yes. You can purchase hosting without buying a new domain if you already own one.
Now that your domain and hosting are ready, the next step is to install WordPress and start building your website. Continue with our next tutorial to learn how to install WordPress on Hostinger and create your first website.